
 Mouse Pointer or Cursor Tutorial – Freeware
I have been honestly addicted to computer for the past few years. I have been so hooked with gaming and chatting to the max! Then came a time when I decided to be engage in more beneficial or worthwhile online activities. That’s when I started to learn about blogging, money online and reading informative tutorials, learning about some computer tools each day. That’s when I learned of how to create a personalized mouse pointer or mouse cursor. I only know 2 file formats for this: CUR for non-animated and ANI for animated cursors or pointers. Meaning, image file formats like jpeg, gif, png and others are not applicable to be used. Over the internet, there’s lots of sites that provides you free mouse pointer download.
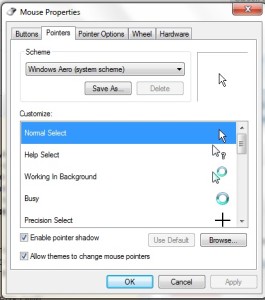 The mouse pointer or mouse cursor is a pointing device to indicate a position in the monitor in which whatever text or image when pointed with this cursor shall respond depending on the user’s action. The very basic design is the normal select pointer or the white arrow shown on the photo above. When you go to the mouse properties,you can actually customize which among the images you could use for every action (help select, working in background,busy,precision select and more). So with this option to change, that’s when I decided to search about creating my very own mouse pointer design. Well I’m not an expert yet but I’m happy enough to create designs with my name on it. I also used the same cursor for my office mates but just change the name accordingly to the users. They sure loved it! You don’t have to be very expert or a computer geek. Just when you know you could follow instructions patiently, then this tutorial would work for you.
By the way, here’s what I made for me and my office mates.
Note: The white background of these samples are actually TRANSPARENT when used

Yup, that’s my name.
MEOW
I just soooo love personalized everything!
I love seeing this cute cursor of smiley with peace sign fingers on my monitor every time I use our computer here at home or at the office. So every time someone else uses my unit, it makes them wonder how I did it.
Like a pro! lol What are you waiting for? Try it yourself!

 Supposed you like to use your picture as your mouse cursor or pointer. Would that be possible? Yes of course! You are very much welcome to use any image you like. Use it ONLINE for your web or blog sites or use it OFFLINE. Enough with the usual download of mouse pointer and use your own masterpiece (yeah!) Read the tutorial carefully, slow but surely guys.
Good luck!
WHAT IS NEEDED?
For us to be able to create a more fancy and cute pointy cursor, we will need this 2 free downloadable programs. Don’t worry about them, they are very much safe, light and easy to use. These are:
Download them now while they are still free.
Important note:
If you plan to use the cursors online for your web or blog sites, some do not work in all browsers. They might work in Internet Explorer 6 or higher and a few others like MSN Explorer but not at all.
How to Make Your Own Mouse Pointer or Cursor (Tutorial Proper)
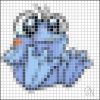
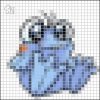
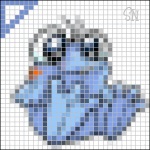
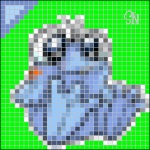
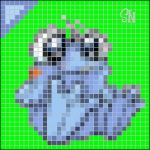
Step 1: Pick a nice image like this cute big-eyed blue frog below.
Choose a stylish, pretty, attractive image that suits your taste. I would prefer an image with clear details. Remember the cursor size is too tiny. So you can’t appreciate it if you can clearly see what it is. This sample is the old Plushie Quiggle Plushie. It’s cute isn’t it?
Right click on this image and choose copy.
 Step 2: Re-size the image
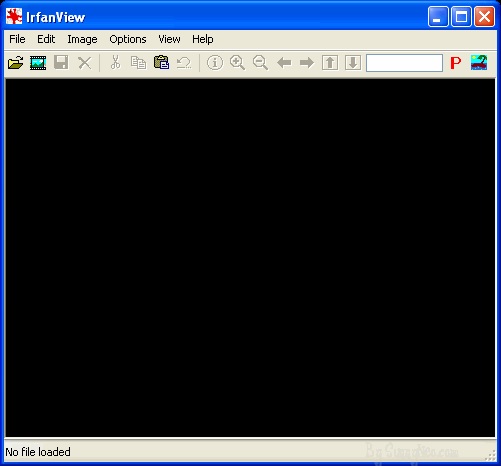
If the image you’ve chosen is still large, then we really have to make it smaller. We would use the program called Irfanview. Make sure to download the 2 programs at the beginning of the tutorial. When you open the tool, it should look like this:
Paste the image into Irfanview. Click Edit then choose Paste.
The mouse pointer or cursor size is 32 x 32 pixels. Means we have to change our image to a size 30 x 30.
Click on: Image, Resize/Resample. See screenshot below:
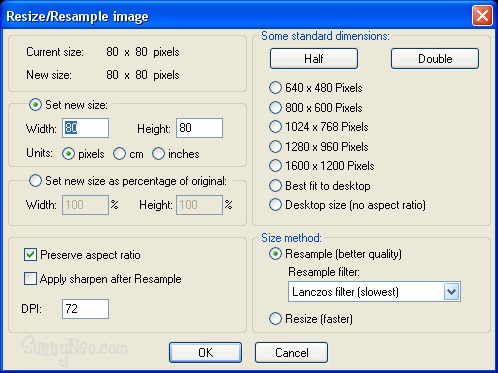
Find the ‘Set new size:’ you’ll see that the width is at 80. Let’s change it to 30. The height automatically becomes 30 too. When you’re done setting both at 30 pixels , then click OK.
![]()
We have the perfect size now! Copy it to your clipboard by clicking on Edit and then Copy then we’re ready for the step 3.
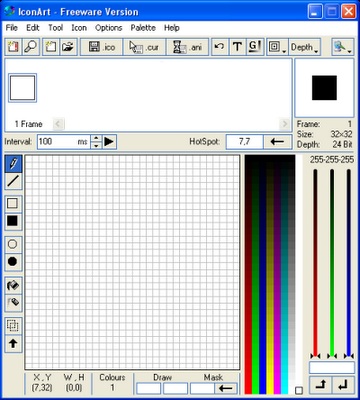
Step 3: Creating the personalized pointer or cursor.
Open the IconArt. At first, you will see the blue interface of the tool but you can customize it’s appearance.
Import the your chosen image into the program. Click on: File, Import From Clipboard. See screenshot below.
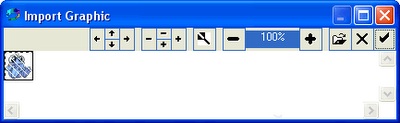
See the top-right portion of the box. Click on the “check” or “okay” button to confirm you got the right image.
When the image is finally inserted in the program, it would look as the screenshot above.Remember that it is already smaller right? But it will just look bigger when you open it using the too. We will now move the image to the right position. Hold the CTRL key on your keyboard and press the arrow keys to move it. Let’s move the image to the bottom right corner. Why?Because remember we will be adding a tiny arrow at the top-left portion of our cursor. See screenshot below for the perfect position.
Now we will add the arrow to indicate accurate position on monitor. Black or white, it’s your choice or you might like a color that suits your image. For me, I usually use black arrow. To change the color palette from all colors to just colors that are in our image click on: Palette, Create Palette From Icon.
Draw a triangle in the top-left most corner of the box. Click on the button shown in the screenshot below.
![]()
Choose a color for the border of your arrow. As shown in the sample below is color dark blue. Click on a color of your choice in the color palette and set it as your color.
Draw a triangle in the top-left most corner. Your choice if you’d like to draw arrow or easiest is to just draw a triangle as shown in the screenshot below. It would be easy to do it because you’re guided with grids or tiny boxes.
If you like, you could also fill the triangle with a color. For this sample, we will use light blue. Click on a color in the color palette and then click on the fill button which looks like this:
![]()
The next step is to check whether the background is really white. Most of the time, it’s blurry with white and grey dots. That would be so ugly so let’s make it to complete white.
To check it is to put the color palette back on all colors. Click on: Palette, Set Palette – Full Color.
Choose a color which DOES NOT BELONG or CAN’T BE FOUND on your image yet.
For our sample,let’s choose lime green. Click on lime green in the color palette and fill the white background of your image with lime green color like what is done to the triangle arrow. See screenshot below:
That’s more like it. Make sure to make all the white and grey parts around your image into lime green (chosen color) except of course for our image and triangle. Select on the pencil tool and click on the grey pixels in the image.
![]()
When it’s completely done, it should look like this. Obviously it’s much better right? Just be patient in doing so.
And since cursors are supposed to have transparent background and disregard the lime green, we will set our mask color before saving it. The mask color will indicate which color will become transparent upon saving the cursor. With our sample, the lime green shall be converted to transparent. Set your draw color on lime green, and click on the arrow next to mask. The mask function can be found at the bottom of the program.
![]()
At the top-right portion of the program, you might see a change like what is shown int the photo below.

The black area represents the transparent part of our image and white box represents the range of our mouse cursor or pointer when it is finally done.
Setting the hotspot. The hotspot is the corner or exact indicator. It’s points to where you desire to click on your monitor. It is automatically set in the middle of the image but of course we need to set it at the top-left most point of our arrow. To change the hotspot position, click on the arrow next to HotSpot:
![]()
You will be guided by looking at the screen whether you’ve finally found the accurate hotspot position.
Click on the top-left corner (0,0), this is the point of the arrow. When you’re done, click ACCEPT.
All is set and what’s left is for us to save the personalized cursor! Your choice if you plan to add TEXT like what I did on my smiley sample. Just remember to eliminated all white and grey parts to have a nice transparent background.
Save it as a .ANI image:
![]()
Now, you could use it immediately! Good job!
How to Change Your Mouse Pointer or Mouse Cursor
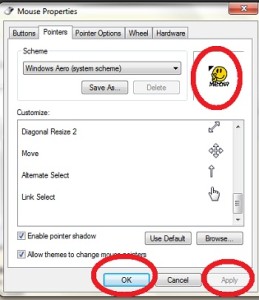
1. Go to the START of your computer and choose CONTROL PANEL.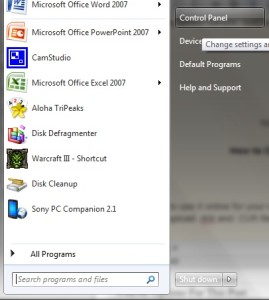
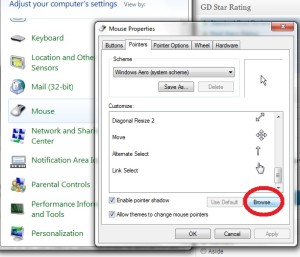
2. Immediately click on the MOUSE folder, click on the POINTERS tab and choose BROWSE and find your personalized mouse cursor or mouse pointer. So make sure you’ve remembered where you have saved your masterpiece. Ah huh!
3. When you’ve found the right file, click APPLY then OK. Tadaaaaaa!
Congratulations! You’ve made it. Try more and who knows you’d discover other tricks and tips.
If you plan to use it online for your web or blog sites, you have to upload the cursor on a host that allows you to upload .ANI and .CUR files extensions. There’s a lot of free hosting sites over the internet.
If your have something to say, I’d be very much glad to read them on the comment section. Cheers everyone!